You'll need to start with proper safety gear, including non-slip boots, gloves, and a safety harness.
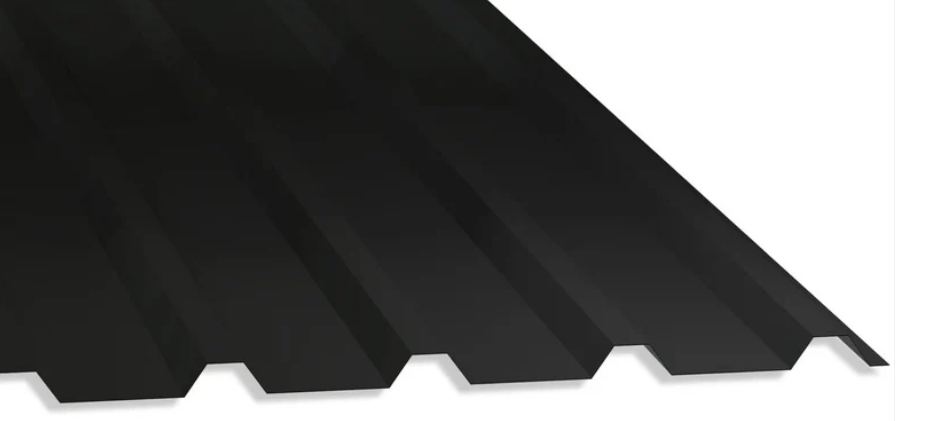
Begin by measuring your roof's dimensions and creating a layout plan that accounts for sheet overlaps and water flow. Verify your purlin framework is correctly aligned and spaced before handling any metal sheets.
When installing, work with a partner to place sheets according to your plan, securing them with self-drilling TEK screws at purlin intersections. Don't forget to apply sealant tape between overlaps and properly flash around protrusions. Following these essential steps will help you achieve a professional, weather-resistant installation that lasts for years.
Key Points
- Verify proper purlin spacing and alignment, then lay sheets starting from the eave working upward to ensure correct water drainage.
- Overlap sheets according to manufacturer specifications and apply sealant tape between joints for weatherproofing.
- Secure sheets using self-drilling TEK screws at purlin intersections, following recommended fixing patterns for wind resistance.
- Install ridge caps and flashings at peaks and valleys, sealing all joints with compatible weatherproof materials.
- Cut and fit sheets around protrusions like vents and pipes, using appropriate framing and weathertight sealing methods.
Safety Equipment and Preparation
Safety measures must be your main concern when installing metal roofing sheets. Before you start any work, make sure you're wearing appropriate safety gear, including non-skid boots, protective gloves, a hard hat, and safety glasses. You'll also require a strong safety harness when working at height.
Commence with a thorough roof inspection to identify any structural issues or weak spots that need attention. Examine your purlin alignment carefully, as proper spacing and levelness are vital for a secure installation.
When handling sheets, never try to lift metal roofing sheets alone or in windy conditions. You'll need at least two people to handle full-length sheets safely, and it's crucial to remove all packaging before lifting them onto the roof.
Before installation, familiarize yourself with correct flashing techniques and make sure you have all necessary flashing components ready. You'll need to pay special attention to areas around chimneys, vents, and other roof protrusions.
Keep your work area free of debris, and don't forget to secure your tools to prevent them from falling. Remember to check weather conditions before starting - avoid installation during wet or windy weather.
Measuring and Planning Your Roof
With your safety preparations complete, precise measurements become your next key step. You'll need to carefully measure your roof's length, width, and pitch to determine the exact amount of materials needed. Take multiple measurements at different points to account for any irregularities in your roof's structure.
When planning your layout, start by sketching your roof and marking where each sheet will go. You'll want to contemplate the direction of prevailing winds and water flow to ensure proper overlap. Remember to account for side laps and end laps in your calculations to maintain weathertight seals.
Before cutting any sheets, double-check your measurements and mark them clearly. You'll need to use appropriate sheet cutting techniques, including proper tools like nibblers or power shears - never use abrasive wheels.
When handling materials, always work with a partner and use proper lifting techniques to move sheets safely.
Keep your material handling organized by staging sheets in a way that matches your installation sequence. This reduces unnecessary movement and minimizes the risk of damage. Remember to factor in extra material for flashings, ridges, and any potential waste from cuts around protrusions.
Setting Up the Purlin Framework
A sturdy rafter framework serves as the foundation of your metal roofing system. When setting up your rafters, you'll need to focus on proper spacing and alignment to ensure ideal support for your roofing sheets. Start by checking that all rafters are level and correctly positioned according to manufacturer specifications. You'll want to maintain consistent spacing between rafters to distribute the load evenly across the entire roof structure.
Consider these vital aspects when installing your rafter framework:
- Guarantee proper rafter alignment by using a laser level or string line to maintain straightness
- Check spacing tolerances carefully - they shouldn't exceed manufacturer recommendations
- Install additional rafter support around roof protrusions like vents or chimneys
- Plan for adequate drainage by maintaining proper falls in the framework
Don't forget to account for any rooftop protrusions that'll require special attention. You'll need to install extra framing members around these areas and prepare for appropriate flashing kits.
When installing flashing, make sure it integrates seamlessly with your rafter framework to prevent water ingress and maintain structural integrity. Remember that proper drainage solutions begin with correct rafter positioning, so take extra care during this essential stage.
Sheet Handling and Transportation
Lifting and moving metal roofing sheets requires careful planning and proper equipment to prevent damage and injury. When transporting sheets, make sure they're properly secured and supported along their length to avoid bending or warping. You'll need to protect the sheets from scratches by using appropriate padding between layers.
Before handling the sheets, remove all packaging and inspect them for any damage. Don't drag sheets across each other or rough surfaces, as this can harm their protective coating.
When lifting sheets, use mechanical aids like a crane or forklift whenever possible, and always have enough people to support the sheet's weight if manual handling is necessary.
For sheet storage, keep the materials in a dry, covered area and slightly elevated off the ground. When stacking sheets, use timber bearers at regular intervals to provide support and prevent sagging.
Don't stack different lengths together, as this can result in damage and make retrieval difficult. If you're storing sheets outside temporarily, cover them with a waterproof sheet and ensure proper ventilation to prevent condensation build-up.
Remember to secure stacked sheets against wind damage, especially on construction sites.
Cutting and Trimming Metal Sheets
Now that your sheets are securely on-site, proper cutting and trimming techniques will determine the quality of your finished roof. Before making any cuts, you'll need to plan your roof layout carefully and take precise sheet measurements. Always double-check your measurements to avoid costly mistakes and material waste.
When it comes to precision cutting of metal sheets, you'll need to follow specific safety measures. Wear appropriate protective gear, including safety glasses, gloves, and ear protection. Use proper cutting tools designed for metal roofing, such as tin snips for straight cuts or an electric nibbler for curved sections.
- Mark your cutting lines clearly with a permanent marker and straight edge
- Position sheets on a flat, stable surface before starting any trimming techniques
- Cut from the ground whenever possible to avoid working at heights
- Always cut sheets face-down to prevent metal fragments from falling into your eyes
Remember to account for overlaps and flashing requirements in your roof planning. If you're working with complex angles or protrusions, create paper templates first to secure accurate cuts. Clean all cut edges with a file to remove sharp burrs before installation.
Installing the First Sheet
Starting with the first sheet sets up the foundation for your entire metal roofing project. You'll need to guarantee proper alignment by positioning the first sheet square to the eave and verge. Begin at the corner that's most visible, making certain the sheet overhangs the eave by approximately 50mm to provide adequate edge protection.
Before placing the sheet, apply a continuous strip of sealant along the top of the eave flashing where the sheet will sit. When you're positioning the sheet, check that it's at a right angle to the eave using a large square or the 3-4-5 method. Secure the sheet temporarily with a few fasteners while you verify the alignment is correct.
For effective weatherproofing techniques, install the appropriate side lap sealant if required by your sheet profile.
You'll need to fix the sheet using the recommended fasteners, starting from the eave and working your way up to the ridge. Don't fully tighten the fasteners until you've checked the sheet's position one final time. Remember, any mistakes in this first sheet will affect all subsequent sheets, so take extra time to ensure accuracy.
Managing Side and End Laps
After securing the first sheet correctly, proper management of side and end laps becomes your next focus. You'll need to guarantee perfect lap alignment between sheets to create a watertight seal that prevents water infiltration. Start by checking that each sheet overlaps correctly, following the manufacturer's specifications for your specific profile type.
For effective lap sealing and waterproofing, you'll need to apply sealant tape or mastic between the overlapping sections. Don't forget to inspect each lap before fixing to verify there's proper contact between surfaces and no gaps that could compromise the roof's integrity.
- Use self-drilling TEK screws at recommended intervals for proper lap reinforcement
- Apply sealant in a continuous bead, avoiding gaps or breaks
- Confirm side laps face away from prevailing wind direction
- Clean all surfaces before applying sealant for better adhesion
Complete a thorough lap inspection before moving to the next sheet. You'll want to check that all fixings are secure and that there's consistent compression of the sealant. If you notice any issues during inspection, address them immediately to prevent future leaks or wind uplift problems.
Securing Sheets With Fixings
The appropriate selection and installation of fixings lies at the core of a dependable metal roof system. You'll need to use high-quality, self-drilling TEK screws that are specifically designed for metal roofing to maximize fixing durability and wind resistance. These fixings should be installed at every purlin intersection and along the side laps of your sheets.
When applying fixing techniques, you'll want to work from one end of the roof to the other, maintaining proper alignment throughout. Start at the eaves and work your way up to the ridge, securing each sheet as you go. Don't overtighten the fixings, as this can damage the sheets and compromise weatherproofing methods. Instead, tighten them just enough to slightly compress the washer.
For best wind resistance, you'll need to increase the number of fixings at the eaves, ridges, and perimeter of the roof. Make sure to use appropriate weatherproofing methods by installing sealing washers with your fixings and applying sealant tape at critical junctions.
Remember to check that all fixings are perpendicular to the sheet surface to prevent water ingress and ensure long-lasting performance.
Flashing and Ridge Cap Installation
With your sheets firmly fastened, proper flashing and ridge cap installation becomes your next major focus. You'll need to take into account waterproofing techniques are implemented correctly to prevent any water infiltration at critical joints and intersections.
Start by installing flashing details at all roof-to-wall junctions, valleys, and around any protrusions, making sure to create proper sealing between different surfaces.
When installing ridge caps, you'll want to take into account expansion joints to allow for thermal movement of the metal sheets. Ridge cap alternatives are available for different profiles, but standard ridge caps typically work well with most installations. Remember to apply sealant tape or foam closures beneath the ridge caps to prevent water and debris from entering.
- Begin flashing installation from the bottom up, overlapping pieces by at least 150mm
- Use compatible sealants and foam strips to ensure watertight joints
- Install expansion joints every 10-12 meters along the ridge line
- Secure ridge caps with self-drilling screws through the crown of the sheet profile
Pay special attention to corners and intersections, as these are common areas for leaks. Double-check all seals and fixings before deeming this phase complete.
Protrusion and Ventilation Solutions
Properly handling roof protrusions demands careful planning and precise execution to maintain water-tightness around pipes, vents, skylights, and other penetrations. You'll need to install additional protrusion framing to support the area around each opening, ensuring the structure can bear the weight and prevent sagging over time.
When you're working with ventilation solutions, make sure you're following manufacturer recommendations for placement and spacing. You'll want to install proper flashing techniques, including back flashing and specialized flashing kits designed for specific types of penetrations. It's essential to maintain appropriate drainage considerations by ensuring water can flow freely around protrusions without pooling.
For best results, you'll need to cut the roofing sheets accurately to accommodate each penetration. Install the bottom flashing first, followed by the side flashings, and finally the top flashing to create proper water runoff.
Don't forget to seal all joints with suitable weatherproof sealant and use compatible fasteners as recommended by the manufacturer. If you're unsure about specific flashing requirements, contact your sheet manufacturer for detailed specifications and suitable flashing kits for your particular roof system.
Frequently Asked Questions
How Long Will My Metal Roof Sheets Last Before Needing Replacement?
Your metal roof's longevity typically extends 40-70 years with proper maintenance. You'll maximize its weather resistance through regular inspections, and most warranties cover 30+ years against environmental impacts.
Can I Walk Directly on Metal Roofing Sheets After Installation?
You shouldn't walk directly on metal sheets as it risks structural integrity and may void warranty coverage. Always use crawling boards and follow safety precautions for long-term maintenance and damage prevention.
What's the Minimum Roof Pitch Required for Metal Sheet Installation?
You'll need a minimum roof pitch of 4 degrees for metal sheets, though steeper pitches offer better weather resistance and drainage. Check your material's compatibility and maintenance requirements with the manufacturer's guidelines.
Will Metal Roofing Make My Building Hotter in Summer?
Your metal roof's reflective properties can actually keep your building cooler. With proper insulation options, ventilation benefits, and energy-efficient coating choices, you'll maintain comfortable temperatures while reducing cooling costs.
Can I Install Metal Roofing Sheets Over Existing Asphalt Shingles?
While roofing regulations often allow installation over existing shingles, you'll need proper furring strips for ventilation. It's cost-effective but check material compatibility and local building codes first.