To effectively repair cold liquid applied roof coverings, start by thoroughly examining the roof to identify any problems such as cracks, blisters, or areas where the coating is peeling.
It's crucial to clean the area needing repair thoroughly to ensure that no dust, debris, or stains interfere with the adhesion of the repair materials. Use solvents that are suited for the type of stain present.
When selecting materials for the repair, choose ones that are designed to withstand the local environmental conditions and that offer high solar reflectance. This is important because materials that reflect sunlight well can help in reducing energy costs by keeping the building cooler.
Apply the repair solution evenly across all damaged areas, making sure to extend the coverage slightly beyond the actual damage to ensure a secure seal.
It's vital to allow each layer to cure completely, following the manufacturer's guidelines regarding temperature and humidity to achieve the best results.
By taking these steps, you ensure that the repairs not only address the immediate issues but also contribute to the long-term durability and efficiency of the roof. This approach not only fixes the roof but also enhances its overall performance in weather resistance and energy efficiency.
Key Points
- Start by thoroughly cleaning the area that needs repair. Remove all dirt, debris, and any stains. This step is crucial as it ensures that the repair material sticks properly.
- Choose a repair material that not only reflects sunlight effectively but is also appropriate for your local weather conditions. This choice helps in energy conservation and enhances the durability of the repair.
- Using a brush or roller, evenly apply the cold liquid repair solution over the damaged section, making sure to extend slightly beyond the edges. This method helps in creating a seamless bond with the surrounding area.
- After applying each layer, wait for it to dry partially before adding the next one. This process is important to build up a sufficient thickness that will last.
- Make sure the repair cures within the temperature range recommended by the manufacturer, and keep it protected from the elements during this time. Proper curing is essential for the repair to hold effectively and withstand future weather conditions.
This step-by-step guide not only clarifies the process but also emphasizes the importance of each step to ensure a successful and lasting repair.
Assessing Roof Damage
Before starting any roof repairs, it's crucial to evaluate the extent of the damage comprehensively.
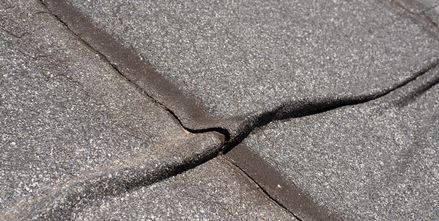
Identifying both visible and hidden issues will help ensure the roof's long-term stability. Begin by examining the roof for any signs of deterioration such as cracks, blisters, or areas where the coating is peeling. These defects may allow water to seep through, potentially leading to mold growth or structural damage.
Also, pay attention to parts of the roof where water tends to collect, like around drains or in depressions on the surface.
Standing water can accelerate the degradation of the roofing material. Additionally, check the roof's edges and seams, as these areas are particularly vulnerable. They're more exposed to weather and may not have been sealed properly initially, raising the risk of leaks.
Preparing the Repair Area
To ensure a successful start to your repair, it's crucial to clean the area thoroughly.
Start by removing all dust, debris, and loose parts of the existing coating. If these remain, they could hinder the bonding of the new material, reducing the durability of the repair.
It's particularly important to tackle any oil or grease stains, as they can seriously affect adhesion. Use hot water or an appropriate solvent to dissolve and eliminate these stains completely, ensuring the new material can bond effectively.
Then, safeguard the sections of the roof that aren't being worked on. Apply masking tape or a protective film that adheres well.
This precaution helps prevent any accidental damage or contamination from the repair materials, maintaining the condition of the rest of your roof.
Selecting the Right Materials
When you're ready to select materials for your roof repair, consider both their performance and their impact on the environment.
In choosing a cold-applied liquid waterproofing system, it's crucial to focus on materials that not only provide a seamless finish but also contribute to energy efficiency.
Such materials often have a high solar reflectance index (SRI), which helps reduce heat absorption and can significantly cut down on cooling costs, especially in hot climates.
Consider the specific requirements of your roofing project as well.
For example,Sika's two-component polyurethane/polyurea based membranes are well-suited for large or industrial spaces because they can be applied quickly, either by spraying or manually, which saves time.
Finally, when deciding between acrylic emulsions and polyurethane modified dispersions, take into account the climate where the material will be used.
Both are low in hazardous substances and highly resistant to UV rays, making them suitable for areas with moderate to warm temperatures.
Applying the Repair Solution
Begin by preparing the surface area where the repair will be applied. It's important to clean the area thoroughly, ensuring it's dry and free of any debris.
This step is crucial because a clean surface ensures that the repair material adheres properly, leading to a more durable repair.
Once the surface is ready, mix the repair solution well to ensure it's uniform.
Depending on the area's size and shape, use either a roller or a brush to apply the solution. Start at one end and move steadily to the other, applying the solution evenly. Be careful to use enough material to cover the area effectively, but avoid using too much to prevent waste and excessive drying time.
Ensure you cover the entire area that needs fixing, extending slightly over the edges of the existing good roof covering.
This overlap helps create a continuous barrier that prevents water from entering. If the product instructions suggest, add several layers. Allow each layer to dry slightly before adding the next.
This method helps form a strong, waterproof membrane durable against weather conditions.
Ensuring Proper Curing
After applying the liquid roof solution, it's crucial to ensure it cures correctly to achieve maximum strength and durability.
The time it takes for the liquid roofing to set properly can range from 24 to 48 hours, depending on the specific product and the current weather conditions.
Make sure the temperature stays within the limits recommended by the manufacturer. If it's too cold, the material will cure very slowly, and if it's too hot, it might dry too quickly, which can prevent it from curing correctly.
It's best to avoid walking on the surface during this period to avoid causing any damage.
Checking the weather forecast before you begin is a wise move.Rain or high humidity can disrupt the curing process, potentially causing the coating to fail.
If rain looks likely, consider using a temporary cover to shield the area.
Performing Regular Maintenance
Maintaining your cold liquid applied roof covering regularly is essential for its longevity and efficiency.
By conducting routine checks every six to twelve months, particularly after harsh weather, you can identify and resolve minor issues before they escalate into expensive repairs.
Here's what to focus on during these inspections:
- Check for Damage: Regularly examine the roof for any signs of deterioration such as cracks, blisters, or holes.
Addressing these early helps maintain the structural integrity of the roof.
- Seal Seams and Joints: Ensure that all seams and joints are properly sealed.
This is crucial to prevent water from seeping through, which could cause more severe problems in the future.
- Clean the Roof Surface: Keep the roof clean by removing debris and dirt.
This not only prevents potential damage but also ensures the roofing membrane functions effectively.
- Maintain Records: Keep detailed logs of all maintenance activities.
Note the dates, details of the procedures carried out, and materials used.
This documentation will be invaluable for future reference and maintenance planning.
- Act Quickly: Promptly address any problems discovered during inspections.
Quick responses can prevent the need for more extensive, costly repairs, or even a complete replacement.
Finishing Off
After completing your cold liquid applied roof repair, it's important to allow the area sufficient time to cure fully. Regular maintenance checks are crucial to detect any potential issues early, thereby prolonging the lifespan of your roof.


