EPDM rubber roofing is an excellent choice for you if you're dealing with a commercial building or a residential flat roof. Its durability and water resistance guarantee minimal leak risks, making it a cost-effective solution.
You'll appreciate the ease of its installation, which only needs a clean surface and standard tools like rollers and cutters. Maintenance is just as straightforward, requiring only bi-annual inspections and regular cleaning to keep it in top shape. Its environmental friendliness is a bonus as it's recyclable and made from recycled materials. Discover how the right installation techniques can extend the life of your EPDM roof.
Key Points
- EPDM roofing is highly durable, weather-resistant, and offers a long lifespan due to its resistance to UV radiation and ozone.
- It provides a seamless installation process, minimizing the risk of leaks and reducing maintenance costs over time.
- Installation requires a clean, dry surface, with tools such as rollers and utility knives, and adherence to manufacturer guidelines.
- Regular maintenance involves bi-annual inspections, cleaning debris, and checking drainage systems to prevent water pooling and damage.
- Troubleshooting common issues includes fixing seam failures with tape or sealant, patching punctures, and adjusting installation errors to correct water pooling.
Understanding EPDM Rubber Roofing
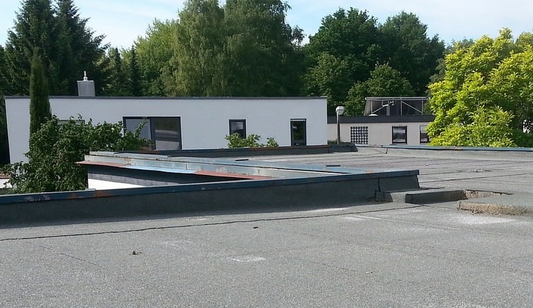
EPDM (Ethylene Propylene Diene Monomer) rubber roofing is a durable synthetic roofing material widely recognized for its resilience and longevity. You've likely seen it on commercial buildings, but it's also a smart choice for residential flat or low-slope roofs.
This rubber roofing is made from a mixture of ethylene, propylene, and a small amount of diene, which serves as a cross-linking agent, providing its elastic properties.
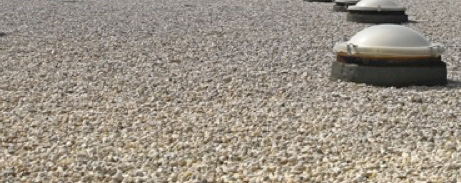
You'll find EPDM in either black or white rolls, varying in width and thickness, typically ranging from 45 to 90 mils. It's installed using either adhesive bonding, mechanical fasteners, or ballasting with stones.
This flexibility in installation methods makes EPDM adaptable to different roofing needs and structures.
Moreover, EPDM sheets are resistant to UV radiation and ozone, characteristics that contribute to their long service life. It's also quite lightweight compared to other roofing materials, which simplifies handling and installation, reducing labor costs.
When you're considering a roofing solution that balances performance with cost, EPDM might just be the material you're looking for. It's not just about covering your building; it's about choosing a solution that works efficiently in various environmental conditions.
Key Benefits of EPDM Roofing
Durability stands as one of the most compelling advantages of choosing EPDM rubber roofing for your building.
This material can withstand extreme weather conditions—from blistering heat to icy cold—without cracking or drying out. You'll find that its resilience against UV radiation and ozone makes it an exceptional choice for long-term protection.
Additionally, EPDM roofing is highly water-resistant, ensuring that leaks and water damage won't be a concern for you.
Its seamless installation reduces the risk of seams failing, which is a common issue in other roofing types. This feature alone can save you a lot of hassle and expense over time.
You'll also appreciate EPDM's low maintenance requirements.
Unlike other materials that might need frequent repairs or replacements, EPDM stays in good shape with minimal upkeep. Periodic cleaning and inspections are generally all that's needed to keep it performing well.
Cost-effectiveness is another significant benefit.
EPDM is one of the most economical roofing materials available today, offering excellent value for its price. The installation process is straightforward and less labor-intensive compared to other roofing options, which further reduces your overall costs.
Choosing EPDM means you're investing in a cost-efficient, durable roofing solution that will serve you well for years to come.
Comparing EPDM With Other Materials
While EPDM roofing offers substantial benefits, it's important to weigh how it stacks up against other popular materials like PVC.
You'll find that each material has its unique strengths and considerations, making your choice dependent on specific needs and environmental conditions.
Here's a quick comparison to help you make an informed decision:
- Durability: EPDM is known for its long lifespan and resistance to weathering.
It generally lasts longer than PVC, which can become brittle over time.
- Cost: EPDM typically presents a more budget-friendly option compared to PVC.
- Installation: You'll find EPDM easier to install,
which could reduce your labor costs.
- Energy Efficiency: PVC is superior in reflecting UV rays,making it better for energy savings in hot climates.
EPDM, however, is more efficient in cooler climates due to its heat retention properties.
- Environmental Impact: EPDM is more environmentally friendly as it's often made from recycled materials and is fully recyclable, unlike PVC which contains chlorine and other hazardous substances.
Preparing for EPDM Installation
Before you set out on installing an EPDM rubber roof, it's essential to properly prepare the workspace and gather all necessary materials.
Start by clearing the roof surface. Remove any debris, dirt, or existing materials that could hinder the adherence of the EPDM sheet. It's pivotal you check for moisture issues or structural damage that needs addressing before the new roof goes on.
Next, you'll want to measure the roof accurately. This step guarantees you order the right amount of materials without excessive waste.
Remember, having a bit extra is better than running short mid-project. Purchase the EPDM membrane, adhesive, sealant, and any other tools you mightn't already have like rollers, brushes, and cutters.
It's also wise to check the weather forecast. EPDM installation requires dry conditions, so plan for a stretch of clear weather.
Unexpected rain can halt your progress and affect the bonding process.
Lastly, verify you have safety gear on hand. Roof work is high and potentially hazardous. Equip yourself with a sturdy ladder, safety harness, gloves, and non-slip footwear.
Taking these preparatory steps seriously sets the stage for a smooth and successful installation.
Step-by-Step EPDM Installation Guide
Once you've prepared your roof and gathered all the necessary materials, you're ready to begin the EPDM installation process.
This guide will walk you through the steps to guarantee your new rubber roof is watertight and long-lasting.
Start by rolling out the EPDM membrane over the clean, dry substrate of your roof.
Make sure it's positioned correctly; you'll typically have some overhang which you'll trim later.
Allow the sheet to relax and flatten for about 30 minutes, which helps eliminate wrinkles before adhesion.
Next, fold back half of the EPDM sheet to expose the underlying roof surface.
You'll apply adhesive in a thin, even layer across this exposed area.
Be patient and thorough; proper adhesive application is vital for a secure and durable fit.
- Evenly Spread Adhesive: Use a roller to apply the adhesive uniformly across the exposed roof.
- Roll Back EPDM: Carefully roll the membrane back over the glued area, avoiding air pockets or wrinkles.
- Seal Edges: Apply adhesive to the roof edges and firmly press the membrane down.
- Trim Excess: Once the adhesive is dry, trim any overhanging membrane for a neat finish.
- Inspect Seals: Check all edges and seams to guarantee they're fully sealed and secure.
Tools and Materials Needed
To start your EPDM roofing project, you'll need several specific tools and materials.
First, gather EPDM rolls, which are the primary material for your roof. You'll also need a utility knife for cutting the rubber sheets to size. Make sure it's sharp to secure clean, precise cuts.
Next, you'll require adhesive specifically designed for EPDM roofing to bond the material securely to the roof surface.
A roller will help you apply this adhesive evenly and achieve proper adhesion. Don't forget a seam roller for pressing down the seams where different sheets overlap, guaranteeing a watertight seal.
You'll also need a measuring tape for accurate measurement, and chalk or a marker to mark where to cut the EPDM. It's vital to get your dimensions right to minimize waste and guarantee coverage.
For the edges and around installations like vents or air conditioning units, you'll use EPDM flashing. This guarantees no water seeps through the roof's vulnerable spots.
Sealant is also essential, providing an extra layer of protection at the seams and around fixtures.
Lastly, verify you have safety equipment, including gloves and goggles, to protect yourself during the installation process.
Essential EPDM Maintenance Tips
Regular maintenance of your EPDM rubber roofing is vital to extend its lifespan and guarantee it continues to protect your building effectively.
By implementing a few straightforward maintenance practices, you'll substantially reduce the risk of damage and prolong the durability of your roof.
Five essential maintenance tips to keep your EPDM roofing in top condition:
- Inspect Regularly: Schedule bi-annual inspections to catch and address potential issues early.
Look for signs of wear, cracking, or detachment.
- Clean Debris: Remove leaves, twigs, and other debris that accumulate on the roof.
This prevents the buildup of moisture and potential damage.
- Check Drainage: Verify that your roof's drainage system is free from blockages.
Proper drainage helps avoid water pooling, which can weaken the EPDM membrane.
- Trim Nearby Trees: Overhanging branches can scratch or puncture the roofing material.
Keeping trees trimmed minimizes this risk.
- Repair Sealants: Monitor and repair edge sealants and caulking to prevent water infiltration.
It's vital to address any sealant failures promptly.
Troubleshooting Common EPDM Issues
While maintaining your EPDM rubber roofing helps mitigate many issues, some problems may still arise that require specific troubleshooting strategies.
Let's plunge into how you can effectively tackle these challenges.
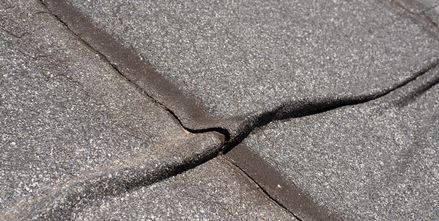
Firstly, if you notice any leaks, it's vital to check for seam failures. EPDM roofs are prone to seam issues over time.
Inspect the seams for gaps or adhesive failures. You'll often find that applying a seam tape or a targeted sealant can fix this problem efficiently.
Secondly, shrinkage can occur, especially in colder climates. If your roof appears to be pulling away from the edges or flashings, it's likely shrinking.
You might need to contact a professional to add additional material and guarantee your roof maintains its integrity.
Another common issue is punctures or tears. These can be caused by falling debris or heavy foot traffic.
To address this, clean the area around the damage and apply an EPDM patch. Make sure the surface is dry and free of any contaminants before applying the patch for maximum bonding.
Lastly, pooling water can be a sign of poor installation or sloping issues.
If you spot water accumulating, reassess the roof's slope and consider adjusting it or adding drainage points to prevent water damage and extend your roof's lifespan.
Rounding Up
Now that you've explored the benefits and installation steps of EPDM rubber roofing, you're ready to make an informed decision. Remember, EPDM stands out for its durability and cost-effectiveness. Gather your tools, follow the installation guide closely, and stick to regular maintenance to extend your roof's lifespan. If you encounter any issues, refer back to the troubleshooting tips. With the right care, your EPDM roof will protect your home for years to come.


