To repair EPDM membrane punctures, first clean the damaged area with an EPDM-specific cleaner and let it dry completely. Cut a patch that extends at least 50mm beyond the damage. Apply a thin layer of compatible adhesive to both surfaces and wait until tacky. Press the patch firmly from center outward, using a rubber roller for complete adhesion. Pay special attention to edges for a watertight seal. Proper technique guarantees your repair will withstand harsh weather conditions.
Key Points
- Clean the damaged area thoroughly with EPDM-specific cleaner and allow to dry completely.
- Cut a patch that extends at least 50mm beyond the damaged area on all sides.
- Apply an even 1/16-inch layer of EPDM adhesive to both the patch and repair area.
- Wait for adhesive to become tacky before pressing patch firmly from center outward.
- Use a rubber roller to eliminate air bubbles and ensure a watertight seal, especially at edges.
Common Causes of EPDM Membrane Damage
While EPDM (Ethylene Propylene Diene Monomer) roofing membranes are known for their durability and weather resistance, they remain susceptible to various forms of damage that can compromise their waterproofing integrity.
Punctures and tears often result from sharp objects, including maintenance tools, construction debris, or careless foot traffic across your roof surface.
Extreme weather conditions pose significant threats to your membrane's performance. Heavy impacts from hailstorms or falling branches can cause punctures, while temperature fluctuations contribute to brittleness and subsequent cracking over time.
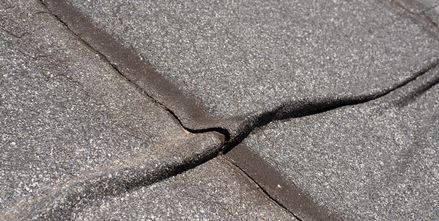
Don't overlook the role of improper installation in membrane failures. Inadequate adhesives or failing to allow the membrane to relax properly can lead to seam failures.
Additionally, debris accumulation creates stress points on your EPDM membrane, especially when combined with water ponding, increasing vulnerability to damage.
Essential Tools and Materials for EPDM Repairs
To properly repair your EPDM membrane, you'll need EPDM rubber membrane and compatible adhesives designed specifically for rubber roofing.
You must include application tools like a rubber roller to guarantee proper adhesion and scissors or a utility knife for precise cutting of patch materials.
Don't forget essential safety equipment including gloves to protect your hands from adhesives and cleaning materials such as scrub brushes and compatible cleaning solutions to properly prepare the damaged area.
Choosing Quality Adhesives
The foundation of successful EPDM repairs lies in selecting appropriate adhesives specifically formulated for rubber membranes.
You'll need high-quality adhesives that create a strong bond between your EPDM membrane and repair materials while providing waterproof properties to prevent future leaks.
When selecting an adhesive, verify compatibility with your specific patch materials or seam tape. Many manufacturers offer complete repair kits with matched components that guarantee excellent adhesion and ideal performance.
These pre-tested combinations eliminate guesswork and enhance repair durability.
Always follow manufacturer guidelines regarding application techniques and curing times. Proper adhesive application greatly impacts repair longevity—rushing this process or using incorrect methods can compromise the bond strength.
Remember that temperature and humidity conditions may affect how quickly your adhesive sets, so adjust your work schedule accordingly.
Specialized Application Tools
Proper repair of EPDM membranes requires specialised application tools that guarantee precise, durable results:
- Rubber roller - Critical for confirming proper adhesion between the patch material and the damaged area by applying consistent pressure.
- Cleaning supplies - Broom, scrub brush, and appropriate cleaning solution to thoroughly prepare the surface before application.
- Cutting implements - Sharp scissors or utility knife for trimming patch material to extend at least 50mm beyond the damaged area.
- Safety gear - Protective gloves and equipment to shield yourself from adhesives and sharp tools during the repair process.
Preparing the Damaged Area for Patching
Effectively preparing the damaged area of your EPDM membrane serves as the foundation for a successful and long-lasting repair. Begin by inspecting the damage to determine patch size requirements, then thoroughly clean the surface with an EPDM-specific cleaner using a broom and soft-bristle brush to remove all debris that could hinder adhesion.
| Step | Action | Purpose |
|---|---|---|
| 1 | Inspect damage | Determine appropriate patch size |
| 2 | Clean surface | Guarantee proper adhesive bond |
| 3 | Trim frayed edges | Create smooth patching surface |
Allow the cleaned area to dry completely before proceeding with your repair, as moisture will interfere with adhesion. Cut your patch to extend at least 50mm beyond the damaged area to provide adequate coverage and secure bonding.
Small Puncture Repair Techniques
Once you've prepared the damaged area properly, addressing small punctures requires precision and the right materials.
- Clean the area thoroughly, removing all debris and contaminants, then guarantee the surface is completely dry.
- Cut a patch that extends at least 50mm beyond the damaged area on all sides.
- Apply adhesive to both the patch and the membrane surface, allowing it to become tacky before pressing firmly.
- Use a rubber roller to guarantee complete adhesion, working from the center outward.
Regular inspections will help you catch small punctures early, allowing for timely repair techniques that prevent escalation into larger issues, ultimately prolonging the lifespan of your EPDM roof.
Addressing Larger Tears in EPDM Roofing
- Cut your reinforced patch to extend at least 50mm beyond the damaged area on all sides.
- Thoroughly clean the repair area and allow it to dry completely before proceeding.
- Apply high-quality EPDM adhesive to both the underside of the patch and the damaged area for ideal bonding.
- Place the new EPDM material carefully over the tear, apply firm pressure, and use a rubber roller to create a watertight seal.
This technique guarantees your patch remains securely bonded to the membrane, preventing moisture infiltration through the repaired section of your EPDM roofing.
Preventing Future Damage
After successfully repairing larger tears in your EPDM roofing, implementing preventative measures becomes essential for extending the membrane's lifespan and avoiding costly future repairs.
Schedule regular inspections twice yearly to identify potential issues before they escalate into major problems.
Use only high-quality EPDM adhesives and primers when making repairs to guarantee strong, durable seams.
Install protective coverings like walkway pads in high-traffic areas to minimize punctures and tears from foot traffic or maintenance equipment.
Maintain a clean roof by removing debris regularly to prevent water pooling, which accelerates membrane deterioration.
Consider applying specialized roof coatings to shield the membrane from UV exposure, which weakens EPDM roofing material over time.
This thorough approach to prevention will considerably reduce the frequency of repairs and extend your roof's service life.
Seam Repair Methods for EPDM Membranes
The integrity of EPDM roof seams often determines the overall waterproofing effectiveness of the membrane system. When seam failures occur, you'll need to act quickly to prevent water infiltration.
Timely repair of compromised EPDM seams is essential for maintaining your roof's watertight integrity and preventing costly water damage.
EPDM seam tape provides a watertight bond that effectively repairs compromised areas.
- Verify both the seam area and tape are clean and dry before application for peak adhesion.
- Create overlapping seams with a minimum of 50mm to adequately cover damaged sections.
- For seams that have pulled apart, cut back damaged portions and apply new tape, thoroughly sealing all edges.
- Conduct regular inspection, particularly after severe weather, to identify potential failures before they develop into significant leaks.
This proactive approach to seam maintenance extends your membrane's lifespan and preserves its waterproofing capabilities.
Post-Repair Inspection and Testing
Once repairs have been completed on your EPDM membrane, an extensive post-repair inspection becomes essential to verify the effectiveness of your work.
Begin with a thorough visual inspection of the patched area, ensuring proper adhesion without gaps or bubbles. Press gently on the repair to check for movement or detachment that might indicate an inadequate seal.
Next, conduct testing by simulating rainfall—spray water over the repair and observe for leaks or moisture intrusion. This confirms the patch's waterproof integrity.
Don't stop after initial inspection. Monitor the repaired section over several weeks, watching for deterioration or performance issues.
Maintain a detailed record of repair that includes date, materials used, and inspection results. This documentation facilitates performance tracking and contributes to your overall maintenance strategy, helping you identify patterns and predict future repair needs.
Rounding Up
Maintaining your EPDM membrane's integrity isn't difficult when you follow proper repair techniques. Remember to clean all surfaces thoroughly, use the correct adhesives, and guarantee complete patch bonding. Test your repairs with a water test or probe check to verify watertight seals. Implement regular inspections and remove debris promptly to extend your membrane's lifespan. With these skills, you'll confidently address future damage as it occurs.


