Installing a liquid waterproof membrane is an effective way to protect your roof from leaks and water damage. Follow these steps for a successful application.
Preparation
- Thoroughly clean the roof surface, removing any dirt, debris, grease or loose material. The surface must be sound, clean and dry before beginning.
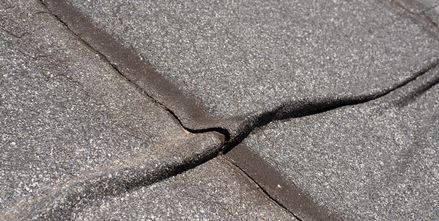
- Repair any cracks, holes or damaged areas in the roof substrate using a suitable sealant. For cracks up to about 2mm wide, use the sealant or filler provided with the liquid membrane kit. Smooth it out to create an even surface.
- If specified by the manufacturer, apply a primer to the roof surface. This is often required for bitumen or felt substrates. Allow the primer to fully dry.
Reinforcement (Optional)
For added strength, apply a reinforcing mat or fibreglass mesh over the primed surface, especially over seams, joints, edges and around details like vents and skylights.
Lay the mat into a thin base coat of the liquid membrane, pressing it in lightly. Allow this to cure before proceeding.
Membrane Application
- Stir the liquid membrane thoroughly in its container, being careful not to introduce air bubbles.
- Using a brush, roller or squeegee, apply an even coat of the membrane over the entire roof surface. Cut in carefully around upstands and details first.
- Apply the membrane at the thickness specified by the manufacturer, typically around 1-1.5mm per coat.
- Allow the first coat to cure for the time stated by the manufacturer, typically 6-12 hours depending on temperature and humidity.
- Apply a second coat of membrane at the same thickness, at the manufacturers advised interval, covering the entire roof again.
Curing and Protection
Allow the membrane to cure fully, which usually takes about 18-24 hours. Protect it from rain or moisture during this time.
Do not traffic the roof for at least 24 hours after application to avoid damaging the membrane.
Once fully cured, the liquid membrane will form a seamless, elastomeric and fully-bonded waterproof layer across the entire roof.
Some key tips:
- Always follow the membrane manufacturer's specific instructions for preparation, application and curing.
- Apply the membrane in dry conditions at temperatures above 5°C for proper curing.
- Use a moisture-curing polyurethane (PU) membrane for best adhesion and durability.
- Protect the membrane from ponding water, traffic and impacts for long-term performance.
By carefully following these installation steps and tips, a liquid-applied roof membrane will provide long-lasting, seamless waterproofing protection for your roof.


