Mastering the intricacies of roof felt installation is an indispensable skill for ensuring the longevity and durability of roofing systems.
Proper installation begins with meticulous preparation of the roof surface, including the removal of old materials and the assessment for any structural damage.
As professionals, it is critical to not only choose high-quality, tear-resistant felt but also to understand the specific techniques involved in layering and sealing these materials effectively.
In the following discussion, we will explore the advanced methodologies that can greatly enhance the effectiveness of a felt roofing system, highlighting common pitfalls and expert tips for overcoming them.
What remains less discussed, however, is the role of environmental factors in determining the choice of materials and techniques.
Key Points
- Begin with a clean, moisture-resistant surface to ensure optimal adhesion and prevent underlay failures.
- Overlap underlay layers properly to enhance water resistance and prevent leaks.
- Use stable, tear-resistant underlay and secure it with nails, ensuring all edges and joints are tightly sealed.
- Apply a top layer of bonded felt with precise alignment and heated adhesive for a firm, weatherproof finish.
- Install durable metal flashings at intersections and apply UV-protective roof paint for extended durability.

Preparing the Roof Surface
Before installing roof felt, it is vital to prepare the roof surface.
Ensure it is free of old materials, dirt, and moisture, and check for any signs of wood decay. Begin by stripping away all remnants of previous roofing layers. Inspect the substrate meticulously for any signs of rot or structural compromise. This step is essential as a compromised deck can lead to failures in the new roofing system.
Next, thoroughly clean the surface to remove dust, debris, and any traces of moisture that could impair the adhesion of the underlay. If installing on a new construction, make sure that the decking is composed of exterior grade plywood or an equivalent moisture-resistant material. This provides a solid foundation for the layers that follow.
Laying the First Underlay
Select a high-quality, stable, and tear-resistant felt underlay material to begin the installation process on the prepared roof, making sure it suits the climatic conditions and roof type. Carefully align the underlay, starting from the bottom edge of the roof and rolling it horizontally. This method helps in achieving a seamless layer, essential for waterproofing.
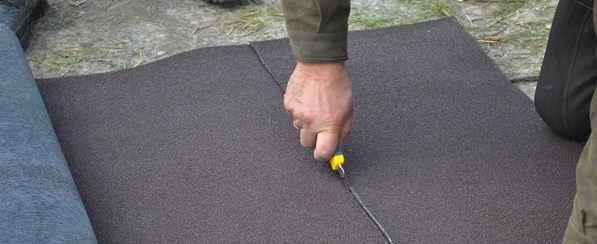
Cut the material to fit the roof precisely, using a sharp utility knife for accuracy. Securely nail the underlay into place, spacing the nails about 12 inches apart and avoiding placement at the edges to prevent tearing.
Take special care at intersections and protrusions, sealing these areas meticulously to prevent potential leaks and ensure durability of the roofing system.
Adding the Second Underlay
Adding a second layer of underlay involves meticulous placement to guarantee joints do not align with those of the first layer, enhancing the roof's overall water resistance and durability.
Carefully measure and cut the second layer of felt, ensuring that it overlaps the first layer by at least 150mm to create an effective barrier against water ingress.
Use a suitable adhesive or double-sided tape along the edges to bond the layers securely, particularly around the perimeter and where the sheets overlap.
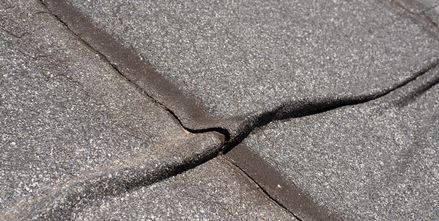
Check for smoothness to avoid any air pockets or wrinkles which could compromise the integrity of the installation.
Applying the Top Layer
To guarantee peak performance and longevity, the top bonded felt layer should be meticulously adhered using the same adhesive method previously described. This top layer is essential as it serves as the primary barrier against weather elements.
Make sure that the surface is completely dry and clean before application to avoid any bonding issues. Roll out the felt carefully, and press firmly to establish a secure bond with the underlying layer. Overlaps should be generous and precisely aligned to prevent water ingress.
Heating the adhesive slightly can improve its tackiness and sealing properties, ensuring a seamless bond. Remember, the effectiveness of this layer is dependent not just on the quality of materials but also on the precision of your application technique.
Final Touches and Protection
Once the top bonded felt layer is securely adhered and inspected, attention must shift towards implementing the final touches and protective measures to guarantee the roof's longevity and effectiveness.
Begin by securing all edges and joints meticulously with a high-quality roofing sealant to prevent water ingress. Make sure that the sealant is compatible with the felt material to avoid chemical degradation.
Next, install durable metal flashings at intersections, around chimneys, and along the roof edges to direct water away from vulnerable areas.
Finally, apply a layer of reflective roof paint to shield the felt from ultraviolet radiation and reduce heat absorption.
Regular maintenance checks are essential to address any potential issues early, ensuring the roof remains watertight and functional.
So to round up : mastering roof felt installation demands diligence, dedication, and a discerning eye for detail.
Prioritizing proper preparation, precise placement of underlays, and meticulous application of the top layer guarantees enduring efficacy and resilience.
Reinforcement of critical areas with robust roofing materials mitigates potential problems, promoting prolonged protection.
Such scrutiny and strategic steps will result in a covering that stands strong against the elements for years to come.
Frequently Asked Questions
How Often Should Roof Felt Be Replaced?
Roof felt typically requires replacement every 20 to 30 years, depending on environmental conditions and material quality. Regular inspections can identify damage or wear that might necessitate earlier replacement to maintain roof integrity.
Can Roof Felt Installation Be Done in Rainy Weather
Roof felt installation during rainy weather is akin to building a sandcastle at high tide: impractical and risky. Moisture can compromise adhesive quality and overall durability, making a dry day essential for this task.
What Are the Eco-Friendly Alternatives to Traditional Roof Felt?
Eco-friendly alternatives to traditional roof felt include recycled rubber, thermoplastic olefin (TPO), and ethylene propylene diene monomer (EPDM). These materials are durable, sustainable, and reduce environmental impact compared to conventional options.
How Does Roof Felt Installation Impact Home Insulation?
Roof felt acts as a thermal blanket, enhancing a home's insulation by creating a barrier that minimizes heat loss and regulates temperature, thereby contributing to overall energy efficiency and comfort within the living space.


